Skip to content
Trail & Terminal

01 — Camp / Guide

Winter camping gear list

Winter camping is not summer camping with a thicker coat. Four systems behave completely differently below freezing, and everything else is the same.

By Brijon M.Last updated How we pick
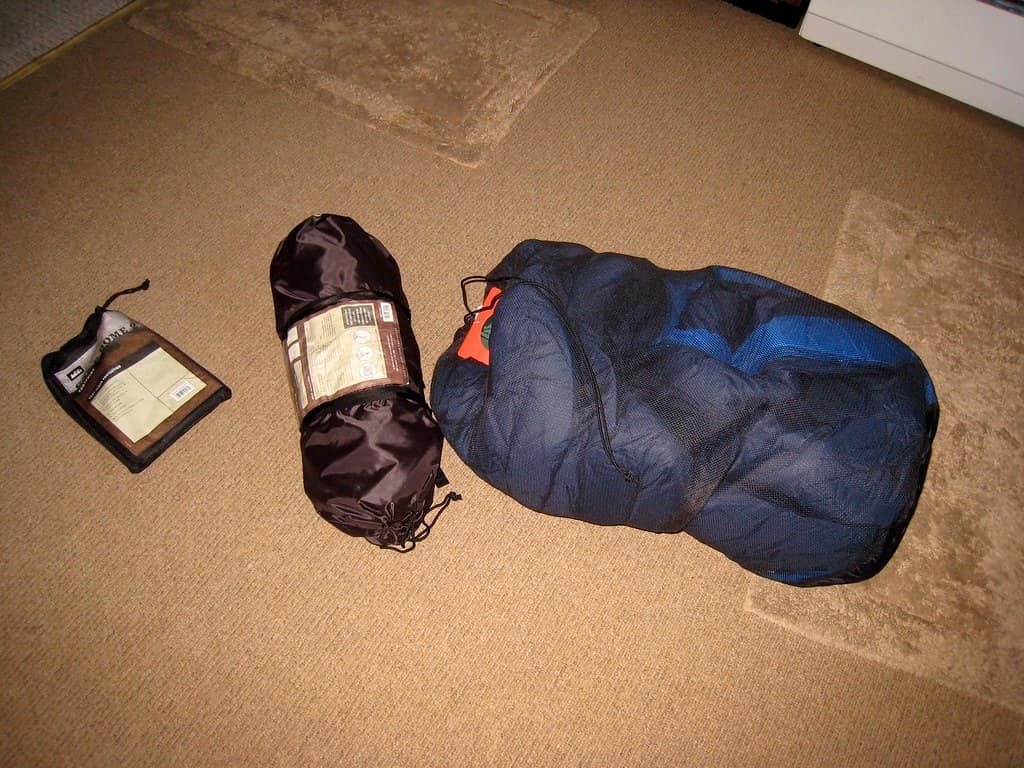
A compressed down sleeping bag beside a bulkier synthetic bag

The short answer

Four things change in winter: you need roughly double the ground insulation, a stove that works below freezing, a plan for water that does not freeze, and a way to manage the moisture you generate. The rest of your summer kit mostly carries over.

01 — Framing

The four things that actually change

Most winter camping lists are enormous and mostly identical to a summer list. That is unhelpful, because it hides the handful of items where cold changes the physics rather than the quantity.

Ground insulation is the first. Below freezing you need roughly double the R-value you would use in summer, and the usual way to get there is to stack a foam pad under your inflatable rather than buy a single very warm pad.

Fuel is the second. An upright canister stove loses pressure as the canister cools, and below about 20F it struggles badly. Liquid fuel stoves and inverted-canister systems do not have this problem because they feed liquid rather than vapor.

Water is the third. Bottles freeze, filters are destroyed by freezing, and hydration hose bladders freeze at the hose first. The fix is mechanical: wide-mouth bottles stored upside down, insulated, and no filter in the kit at all.

Moisture is the fourth and the one that catches people out. You sweat on the way in, that moisture migrates into your insulation overnight, and a damp down bag loses most of its loft. Managing moisture is most of what winter technique is.

02 — Checklist

The list

Everything below is a winter-specific addition or substitution. Assume you are already packing a standard three-season kit underneath it.

  • Sleeping pads totaling R 5.5 or more -- in practice a foam pad under an insulated inflatable
  • A bag or quilt rated at least 10F below the forecast low, because ratings are a limit not a target
  • A vapor barrier liner or a breathable liner, if the trip is longer than two nights
  • A liquid-fuel stove, or a canister stove with an inverted-feed regulator
  • More fuel than you think -- melting snow for water uses several times the fuel boiling the same volume does
  • Wide-mouth bottles, insulated, stored mouth-down so ice forms at the base not the cap
  • An insulated bottle for hot drinks, filled before bed
  • No water filter: freezing destroys the element and you cannot tell by looking. Chemical treatment or boiling instead
  • A four-season or sturdy three-season tent with the ability to close the vents down
  • A snow stake set or deadman anchors; normal pegs do nothing in snow
  • A foam sit pad -- sitting directly on snow is a fast way to get cold
  • Spare dry socks, gloves and a hat, kept in a dry bag inside the pack
  • Headlamp with lithium cells. Alkaline batteries lose most of their capacity in the cold
  • A brush or small whisk for getting snow off everything before it enters the tent
  • A shovel if there is enough snow to build a windbreak or a kitchen pit
  • Sunglasses and sunscreen. Snow reflects enough UV to burn the underside of your nose

03 — The night

Sleeping warm below freezing

If one part of the trip goes wrong it is the night, and it is almost never the bag's fault.

Insulation underneath comes first

Compressed insulation does nothing, so the loft under you is already out of action. Everything between you and the frozen ground has to come from pads. Two pads stacked, R-values added, is the standard answer -- what R-value sleeping pad do I need works through the arithmetic.

Go to bed warm, not merely dry

A sleeping bag does not generate heat, it retains it, so getting into one cold means staying cold. Do something brief and active before bed, eat something fatty, and take a hot insulated bottle into the footbox. Change into sleeping clothes that have not been worn all day.

Down versus synthetic changes in winter

Down is warmer per ounce and collapses when damp, and winter trips generate damp. On single overnights down is still the right call; past two or three nights without a chance to dry out, synthetic or a vapor barrier liner starts to win. The tradeoff is set out in down vs synthetic sleeping bag.

04 — Camp kitchen

Stoves, water and the cold-weather failures

Two pieces of equipment fail in ways that have nothing to do with build quality, and both failures surprise people the first time.

An upright canister stove works by letting liquid gas boil into vapor inside the canister. As the canister cools -- from the ambient temperature and from the evaporation itself -- the pressure drops, and the flame weakens until it will not boil water. The standard isobutane mix struggles from about 20F down. A liquid-fuel stove pressurizes its own bottle and does not care.

A water filter is worse, because it fails silently. If the element freezes, the ice expands and cracks the hollow fibers; the filter still flows and still looks fine and no longer filters anything. There is no field test for this. In winter you either leave the filter at home and treat chemically or boil, or you sleep with it.

The fuel budget also changes. Melting snow to get water takes several times the fuel of heating the same volume of liquid water, and if you are melting all your water you should plan on roughly double to triple the summer fuel figure. Stove options are in best camping stoves and Jetboil vs MSR PocketRocket.

05 — Technique

Moisture is the thing that ends trips

Everything in winter camping comes back to water in the wrong place. You sweat walking in, that vapor moves out through your clothing and condenses when it reaches a surface at freezing point, and over a few days your insulation quietly gets wetter and less effective.

The techniques that address it are all free. Start the day deliberately underdressed and let movement warm you rather than peeling off layers once you are already sweating. Stop and vent before you need to. Keep the shell's pit zips open on the climb. Brush every trace of snow off boots and gaiters before they enter the tent, because snow in a tent becomes water in a tent.

Overnight, open a vent even when it feels wrong. A sealed tent with two people in it generates a liter or more of water vapor across a night, and all of it has to go somewhere. A vent costs you a degree or two of air temperature and saves you a frost layer raining down at dawn.

What to buy

The gear we would buy for this

Trail & Terminal earns a commission when you buy through our Amazon links, at no extra cost to you. It does not change which products we pick -- see our affiliate disclosure and selection method.

1

Best for the top half of a pad stack

NEMO Tensor All-Season

R 5.4 on its own, and with a foam pad underneath it comfortably clears the winter threshold.

This is the part of the sleeping system that does the comfort work. The insulation work is shared with the foam pad underneath, which is why the combination is better than a single very expensive pad.

Inflate it inside the tent rather than outside. Breath inflation in freezing conditions puts moisture inside the pad where it will freeze, which is why the pump sack is not optional in winter.

Specs

  • ASTM-tested R-value around 5.4
  • 3 inches thick
  • Quieter than most high-R inflatables
  • Pump sack included

Good for

  • Enough on its own for most nights above zero when stacked
  • Packs small for the insulation it carries
  • Stable edges, which matters more on an uneven snow platform

Bad at

  • Inflatable, and a puncture in winter is a serious problem
  • Too warm for summer use
  • Costs several times a foam pad
2

Best for the bottom half, and the backup

Therm-a-Rest Z Lite Sol

R 2.0 that cannot puncture. In winter this is a safety item as much as a comfort one.

The redundancy argument is the real one. If the inflatable fails on a winter night, a foam pad is the difference between an uncomfortable night and a genuinely dangerous one.

Cut a torso-length section if weight matters. Hips and shoulders are where the pressure and the heat loss are concentrated, and legs can go on the pack.

Specs

  • Closed-cell foam
  • R-value around 2.0
  • About 14 oz
  • Folds flat, straps outside the pack

Good for

  • Adds its full value to whatever sits on top of it
  • Works perfectly even if it has been dragged across ice
  • Doubles as the sit pad you will want all day

Bad at

  • Bulky on the outside of a pack in wind
  • Thin and firm on its own
  • Easy to leave behind because it looks like the least important item
3

Best for a few extra degrees, and keeping the bag clean

Sea to Summit Thermolite Reactor Liner

A cheap way to extend a bag's usable range and to keep body oils out of down that you cannot wash on the trip.

Treat the claimed figure as a best case and the real gain as a few degrees. That is still worth having, and the hygiene argument is independent of the warmth one: a liner takes the sweat and skin oils that would otherwise degrade the down.

If you are consistently cold at the rated temperature of your bag, check the pad first. A liner on top of an under-insulated pad does very little. <a href="/trail/how-to-choose-a-sleeping-bag">How to choose a sleeping bag</a> covers what the ratings mean.

Specs

  • Thermolite hollow-fiber liner
  • Manufacturer claims around 8F of added warmth
  • Around 8 oz
  • Machine washable

Good for

  • Far cheaper than the next bag up
  • Washes easily, which a down bag does not
  • Packs tiny and weighs almost nothing

Bad at

  • Claimed temperature gains for liners are generally optimistic
  • Adds a layer to wriggle inside, which some people hate
  • Does nothing about ground insulation, which is the usual problem
4

Best for a stove that does not care how cold it is

MSR WhisperLite International

Liquid fuel, self-pressurizing, field-maintainable. The reason winter campers still carry white gas.

The argument for liquid fuel in winter is simple: canister pressure falls with temperature and liquid fuel pressure does not, because you pump it yourself. Below about 20F that difference goes from academic to decisive.

Melting snow is the fuel-hungry task, so carry more than the summer calculation suggests. If you only ever camp just below freezing, an inverted-canister remote stove is a lighter compromise -- the field is in <a href="/camp/best-camping-stoves">best camping stoves</a>.

Specs

  • Runs on white gas, kerosene and unleaded
  • Self-pressurizing fuel bottle
  • Field-serviceable, with a maintenance kit
  • Requires priming before use

Good for

  • Output does not fall away as the temperature drops
  • You can see exactly how much fuel is left, unlike a canister
  • Repairable in the field with a few parts

Bad at

  • Priming is fiddly and produces a yellow flare for the first thirty seconds
  • Heavier and messier than a canister stove
  • Needs cleaning and maintenance that a canister stove does not

Questions

Frequently asked

What gear do I need for winter camping that I do not need in summer?
More ground insulation (R 5.5 and up, usually two stacked pads), a stove that works below freezing, snow stakes, lithium batteries, and a plan for water that does not involve a filter. The rest of a three-season kit carries over.
Can I use my regular camping stove in winter?
An upright canister stove loses pressure as the canister cools and struggles below about 20F. A liquid-fuel stove or a remote inverted-canister stove feeds liquid rather than vapor and does not have the problem.
Will my water filter work in winter camping?
Not after it freezes. Ice cracks the hollow fibers, and the filter still flows and looks fine while no longer filtering. In freezing conditions use chemical treatment or boiling, or keep the filter inside your bag overnight.
How cold is too cold for camping?
There is no fixed number -- it depends on whether your sleeping system matches the forecast. The practical limit for most people is where their pad stack and bag stop clearing the overnight low with margin to spare.
How do you keep water from freezing while winter camping?
Use wide-mouth bottles, store them upside down so ice forms at the base rather than the cap, insulate them, and fill one with hot water before bed. Skip hydration bladders -- the hose freezes first and cannot be thawed easily.

Back up a level

This page sits in Camp -- campsite kit: shelter, sleep, kitchen, light and power.

Read next